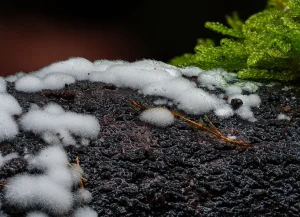
Mold growth in your home can be alarming, but don’t panic! This comprehensive guide empowers you to tackle mold removal safely and effectively. Learn identification tips, removal strategies, and prevention methods for a mold-free living space.
How Do I Remove Mold from Small Areas in My Home? A DIY Guide
Mold lurking in your home can be a disconcerting discovery. While extensive mold growth often requires professional remediation, smaller areas can be tackled with a DIY approach. However, safety is paramount. This guide equips you with the knowledge and steps necessary to safely and effectively remove mold from your home.
When to Call a Professional Mold Remediation Company
Identifying the Mold Threat: Friend or Foe?
Not all mold is harmful. However, some mold varieties can pose health risks, especially for individuals with allergies or respiratory problems. Before tackling removal, it’s crucial to identify the type of mold you’re dealing with.
- Visual Inspection: Mold typically appears as fuzzy patches on surfaces, often green, black, or brown in color.
- Musty Odors: A musty odor in your home can be a telltale sign of mold growth.
When to Call a Professional Mold Remediation Company
While DIY mold removal for small areas is possible, there are situations where seeking professional help is crucial:
- Extensive Mold Growth: If the mold covers an area larger than 10 square feet, professional remediation is recommended.
- Mold Affecting HVAC Systems: Mold growth within air ducts or HVAC systems requires professional cleaning to prevent further contamination.
- Hidden Mold Growth: If you suspect mold behind walls or under floors, professional inspection and removal are necessary.
- Unidentified Mold Species: If you cannot identify the type of mold, consulting a professional is crucial to determine the appropriate removal methods.
Safety First: Gearing Up for Mold Removal
Mold spores can irritate the lungs and exacerbate pre-existing respiratory conditions. Before embarking on DIY mold removal, prioritize safety with these precautions:
- Protective Gear: Wear gloves, safety goggles, and an N-95 respirator to prevent inhaling mold spores.
- Ventilation: Open all windows and doors in the affected area to create maximum air circulation.
- Containment: Use plastic sheeting and tape to seal off the mold-infested area and prevent spores from spreading to other parts of your home.
DIY Mold Removal: Eradicating the Unwanted Guest
For small mold patches on non-porous surfaces, here’s a step-by-step approach to DIY removal:
Materials:
- Rubber gloves
- Safety goggles
- N-95 respirator
- Plastic sheeting and tape
- Spray bottle filled with white vinegar solution (equal parts white vinegar and water)
- Stiff-bristled brush
- Microfiber cloths
- Trash bags
Steps:
- Preparation: Don your protective gear, ensure proper ventilation, and contain the area with plastic sheeting.
- Apply Vinegar Solution: Saturate the moldy area with the vinegar solution using the spray bottle.
- Scrub the Mold: Using the stiff-bristled brush, scrub the mold vigorously. The vinegar solution should loosen the mold spores.
- Let it Sit: Allow the vinegar solution to sit on the surface for 10-15 minutes to ensure effective mold removal.
- Wipe Clean: Wipe the area with clean microfiber cloths dampened with plain water.
- Disposal: Dispose of the used cloths, gloves, and respirator in sealed trash bags to prevent spore dispersal.
Important Notes:
Never mix bleach with ammonia! This combination creates toxic fumes that can be extremely hazardous.
Test on an inconspicuous area before applying the vinegar solution to the entire moldy surface.
Porous surfaces (e.g., drywall, carpet) may require removal and replacement if heavily infested with mold.
Preventing Mold Growth: Keeping Your Home Mold-Free
Mold thrives in damp environments. Here are essential strategies to prevent mold growth in your home:
- Maintain Proper Ventilation: Ensure proper ventilation in bathrooms and kitchens by running exhaust fans during and after use.
- Address Moisture Issues: Fix leaky pipes, faucets, and roof problems promptly to prevent moisture build-up.
- Control Humidity Levels: Invest in a dehumidifier to maintain humidity levels below 60% in your home.
- Dry Damp Surfaces Immediately: Don’t let water linger on surfaces. Clean up spills and leaks promptly to prevent moisture build-up.
- Increase Air Circulation: Open windows regularly to promote air circulation and prevent moisture buildup, especially in areas prone to condensation.
- Clean Regularly: Clean bathrooms and kitchens regularly with disinfectant solutions to prevent mold growth on surfaces.
Living with Mold Allergies: Minimizing Exposure
If you have allergies or respiratory sensitivities to mold, minimizing exposure is crucial. Here are some additional tips:
- Air Purifiers: Consider using air purifiers with HEPA filters to trap airborne mold spores.
- Houseplants: Certain houseplants, like snake plants and peace lilies, are known to filter air pollutants, including mold spores.
- Regular Vacuuming: Vacuum carpets and upholstery regularly to remove dust and potential mold spores.
- Shower Caps and Steam Cleaning: Consider wearing shower caps to minimize mold inhalation while showering and steam clean bathrooms regularly.
Conclusion: A Mold-Free Future for Your Home
Mold doesn’t have to be a persistent threat.
By following these steps for identification, safe DIY removal (for small areas), and prevention strategies, you can create a mold-free environment for yourself and your family. Remember, when in doubt, especially with extensive mold growth or unidentified mold species, seeking professional help is always the safest and most effective course of action. With a proactive approach, you can breathe easy and enjoy a healthy, mold-free home.

